Insert Custom Group Fields
You can group several eCapture fields into a single field in the export file. For example, you can group the Author and Manager fields to create a group field called authorgroup.
Or, you can sort attachments by a field that you specify instead of by image key order. For example, you might want to group all of the Microsoft Word attachments together within their parent documents. To do this, you would create a Group based on Application Name (a metadata field), add it to the fields to export, and sort by that field.
You might create a group if you want to:
-
Have related information appearing together and/or be treated as a single field in the litigation database.
-
Sort attachment ranges in some other way than image key order within their parent documents.
The eCapture fields are separated by the selected Delimiter in the export file’s group field.
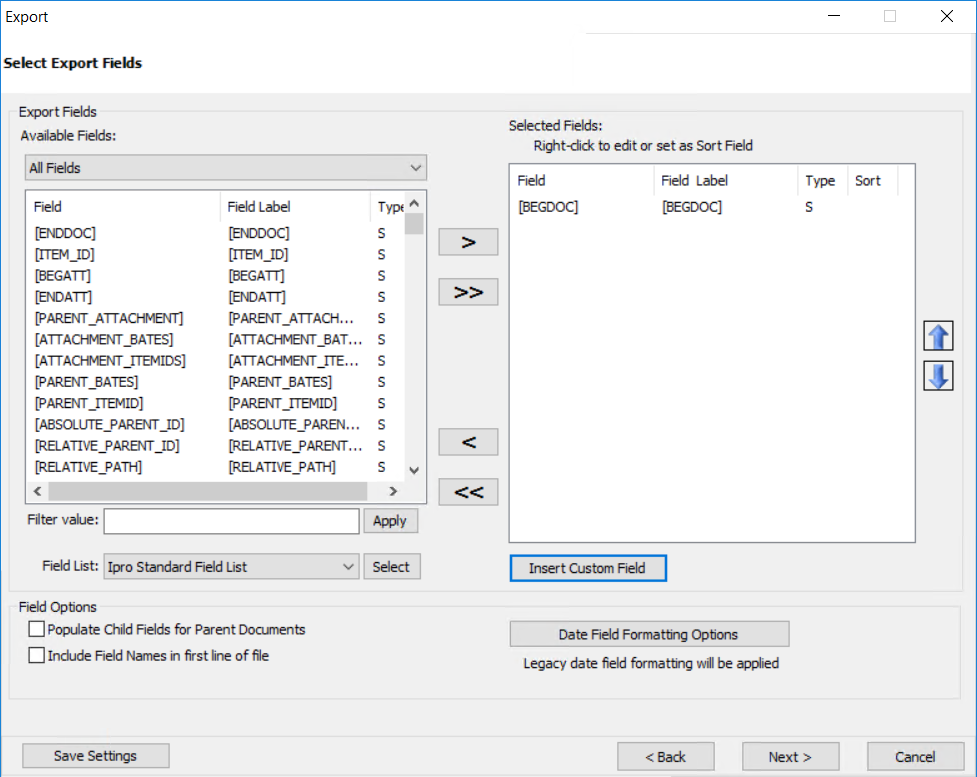
Group fields are available for selection in the Select Export Fields screen during an export. See Create a Data Extract Export Job or Create a Processed Data Export Job for more information about creating export jobs.
-
On the Select Export Fields screen in the export wizard, click
 to open the Insert Custom
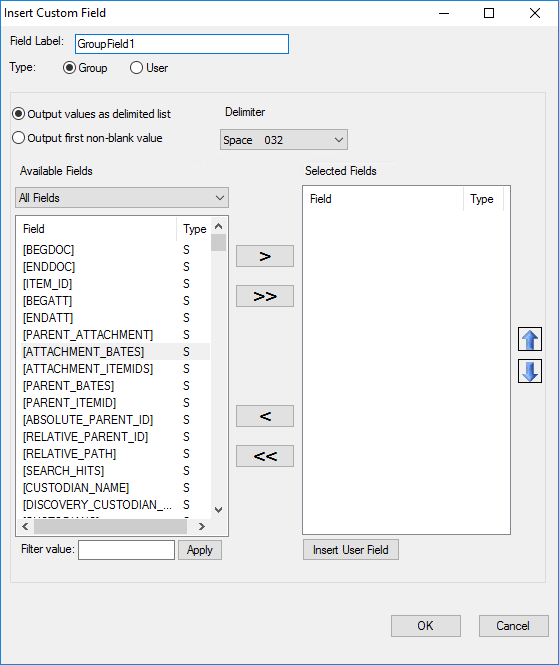
Field dialog. By default, Group is selected as the type. To create a
Custom User Field, seeInserting Custom User Field Labels.
to open the Insert Custom
Field dialog. By default, Group is selected as the type. To create a
Custom User Field, seeInserting Custom User Field Labels.
-
Enter a meaningful name for the group of fields in the Field label field.
-
Select one of the following:
- Output values as delimited list and select a Delimiter to use from the drop-down list.
- Output first non-blank value: eCapture looks for data starting with the top field on down for multiple fields. The first field encountered with data will be placed in the Group field.
-
Click the Available Fields drop-down menu and select a specific field type. By default, All Fields display. To further narrow the field list, enter a value in the Filter Value field located below the Available Fields list. For example, to see only those fields that contain the word “date”, enter date and click
 . To display all
fields, delete the value and click .
. To display all
fields, delete the value and click . -
Select each field you want to include in the group by clicking it twice. Each selected field appears in the Selected Field box. Ctrl-click to select non-contiguous fields. Shift-click to select a contiguous range.
-
Click
 to display the Text Field
dialog. Enter text and click OK.
to display the Text Field
dialog. Enter text and click OK. 
Note: When endorsing, the custom user field is aligned side by side with the system field. For example, ItemID 77878, where ItemID is the user field label and 11878 is the actual [Item_ID].
-
If necessary, use the
 or
or  to change the order of the fields
in the Selected Fields box. Select a field and then use either arrow
to reposition it accordingly.
to change the order of the fields
in the Selected Fields box. Select a field and then use either arrow
to reposition it accordingly. -
Click OK. The Insert Custom Field dialog closes and you return to the Select Export Fields screen. The newly created Group Field appears in the Selected Fields box. Notice that G appears in the Type column. G is for Group Field.
-
Repeat the previous steps to create additional Group Fields.
-
Click OK to return to the previous export screen.
Change the Group Field Label
-
To change the Group Field Label, select it in the Selected Fields box.
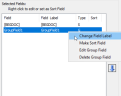
- Right-click to display the context menu.
- Choose Change Field Label to open the Edit Field Label dialog.
- Modify the Field Label.
-
Click OK.
Note: The change made here affects how a field’s label will appear in the header row of the export file.

Make the Group Field a Sort Field
To make the Group Field a sort field, select it in the Selected Fields box.
Right-click to display the context menu.
Choose Make Sort Field.
A Y appears in the Sort column.
|
|
Note: To remove sorting, right click the field to display the context menu. Choose Clear Sort Field. |
Edit the Group Field's Value
- To edit the Group Field’s value, select it in the Selected Fields box.
- Right-click to display the context menu.
- Choose Edit Group Field to open the Edit Export Group Field dialog.
- Modify the Field Label value.
- Click OK.
Delete the Group Field
|
|
Important: If a Group field is needed in either the Summation or Endorsement screens, do not delete the field. Instead move it to the Available Fields box. |

- To delete the Group Field, select it.
- Right-click to display the context menu.
- Choose Delete Group Field.
- A warning box appears asking if you want to delete it. Click Yes.
Related Topics